Earlier this summer I found this old well worn travel chest in the burn pile. I had been wanting to make my daughter a puzzle table for Christmas and this looked like an excellent starter base for the project. I envisioned a surface big enough to spread out a 3000 piece puzzle with the ability to lift the puzzle surface up to allow a seated person on the couch easy access to the table top.


The chest has inner features too. There is a multi compartment sliding shelf and a sliding inner compartment as well. The chest appears to be made of cedar and it is extremely well built. This chest is heavy and aside from age is in really good shape. My design was to remove the lid and replace with a top that worked both as lid for access to the interior and as a lift to elevate the surface.
I started this project on September 11 2024 and I underestimated the amount of work it was going to take and I overestimated my abilities to get the work done. Needless to say there were several gotchas and it took nearly all my crafting time in December.
My Plan
I sketched out my design and built a plan. Nothing too difficult. I figured I could do the project for about $100
- Remove hardware
- Sand
- Replace lid
- Construct a collar
- Insert lift hardware
- Construct large table top
- Replace hardware
- Decoupage
- Stain
- Polly surface
- Install hardware

To begin the process I had to disassemble the chest. I started by taking off the hardware. To my surprise the unit had these antique brass screws holding the metal corner protectors onto the box. My modern screw drivers didn’t fit the screws, the screws were more narrow so the flat end of the screw driver didn’t fit. I tried a variety of things to get the protectors off. I pried some of them off using my pry bar but as you can imagine that destroyed the corner protectors. That was a mistake that would come back later. I’ll summarize my mistakes at the end for reflection purposes. I ended up discovering that because the fittings are made of brass I could use my modern flat head screw driver to remove the screws if I tapped the end of the screw driver into place with a hammer. BTW, brass doesn’t stick to the magnet bowls used to keep your screws from going flying if accidently knocked off your table.


Sanding
After the hardware was removed I was able to begin sanding. I think I used every sander I have to get the job done. This was a dirty, noisy job. One should definitely think about a respirator here. There is so much dust in the air while sanding that it’s impossible to avoid breathing in the dust. This is dangerous and you should protect yourself. For reference visit https://www.osha.gov/wood-dust. I used a combination of simple over the mouth masks all the way to the full on over the face respirator. I didn’t record how long I spent on this step but by September 24th I took these images of the finished process.


Sandpaper is defined by its grit count. The courser the sandpaper’s surface the lower the grit number which impacts how aggressively it removes material. I used a belt sander with 34 grit on the exterior of the chest, especially on heavily stained or damaged areas. Once I had the grime off the surface I used 60 grit sanding discs on a random rotatory sander where I could. I eventually moved up the scale to about a 220 grit. I wanted the chest to retain some of its rugged character. In cases where I needed more control I used a pointed finishing sander and a detail sander. This allowed me to get into tight spaces with a power sander. Along the routed edges of the base and top collar I used a sanding sponge and loose pages of sandpaper so my fingers could match the edging. I will eventually learn a lesson about sanding and its effects on the final finish but more about that later.
Replacing the Lid
In order to have a lid that can be lifted up I needed some hydraulic table top lifts. I spent a few hours doing some research on lift hardware and ultimately decided to use the hardware I found on Amazon. It’s the least expensive way to produce the desired effect. These lifts cost me $26. Funny the hardware doesn’t actually come with the screws to affix the hardware. Lucky me I have plenty of screws so no additional costs here.

The hardware base is a little wider than the original lid collar. I would create a new lid collar so that it fits properly. I didn’t know it at the time but I was about to embark on a big mistake. I needed fresh wood to make the collar.
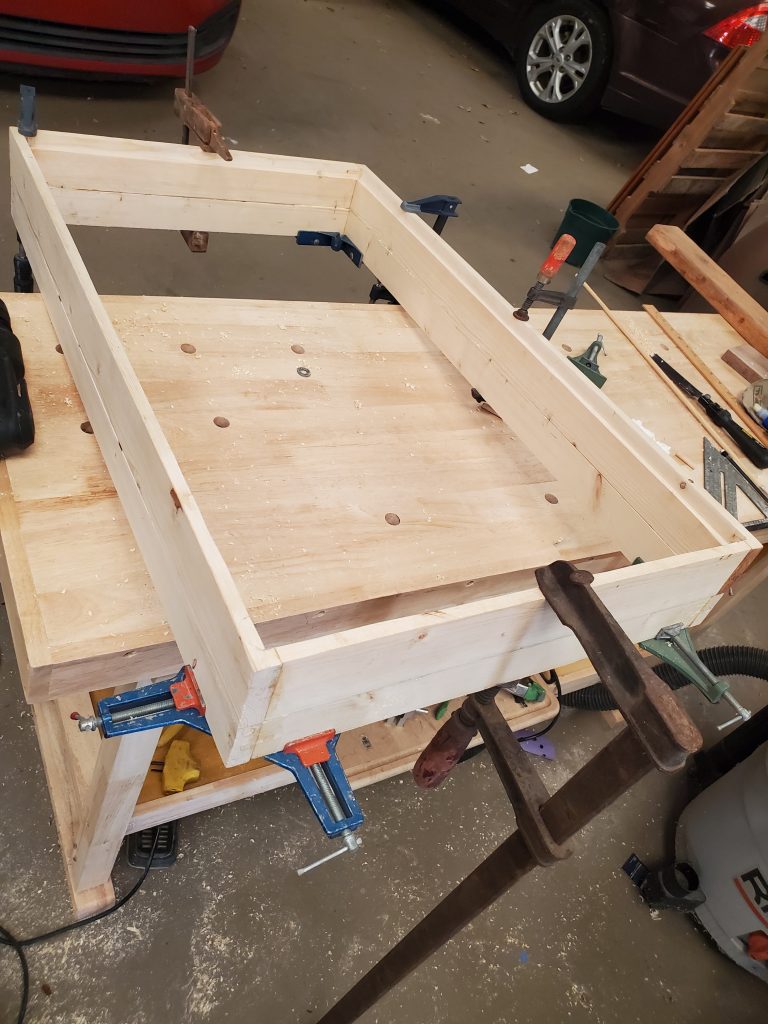
I picked up two 8ft long 1×6 pine boards to make a new wider collar. I ripped the boards in half which produced a slightly wider collar as shown to the right. This modification provided ample room to secure the hardware.

I used the dowel joint technique to assemble the collar. I didn’t have sophisticated tools so I used a metal washer as a measuring device to ensure the holes I drilled for the dowel joint would match up. I used a 5/16 drill bit and 5/16 dowel rod cut down into 1 inch pins. I simply used wood glue to hold the collar together. I took these photos on Oct 9th 2024 showing my progress and washer technique.


It’s important to be square when making something like the lid collar. The squareness is critical since the Chest base is basically a cube. I had some 90 degree clamps that I used to hold the corners while the glue dried. Also, notice the large clamps applying pressure to the outside of the dowel joint. By doing this I was ensuring maximum contact of the wood glue. I let this dry for several days before taking all the clamps off and realizing my design wasn’t quite right. Snap!

So here is what happened. Modern boards are cut to their dimensions called the Nominal size but are actually smaller by the time they are purchased. In fact, there were no standards about milling sizes until the 1920s when Congress and the lumber industry settled on standard sizes. (reference). I’m not saying this chest is from the 1920s but the width of the original collar is about 1/4 inch less thick than the thickness of a modern 1×6. That means my newly built collar didn’t actually fit the lip of the chest. I decided to use my router to remove 1/4 inch from the interior edge. It’s a good idea to refresh yourself with how to use a router. It is a very powerful machine and no mater how hard you hold that board with your hands, you’re no match for the torque of the router. It’s nearly impossible to cut a straight line without some sort of a guide.
I don’t recall the exact date I modified the replacement lid collar, but these pictures of the repairs I had to make happened on Oct 11, 2024. These gouges in the wood happened so fast while attempting to route out the lip of the collar on my router. I ended up cutting out custom shapes of pine using my band saw and sanders to fill the voids created by my over eager router. I just glued these pieces back into place and let the glue dry while under pressure of the clamps. Not pretty but at least I can hide the mistake.


At this point in the project I thought I was almost done. Lol. I’m about to reveal the critical mistake that set me back another week or so. In the meantime I cut out a sample table top out of scrap plywood so that I could see the semi finished product. I wanted a surface large enough for a 5000 piece puzzle but those dimensions didn’t work out so well. It looked too square. I ended up using 1/2 a sheet of plywood for the long part and eye balled the depth. Not a bad looking table.
The Big Set Back
By October 14th I realized I had made a significant error. Essentially 2 weeks into the project I discovered that my replacement lid collar is too narrow. In my design I accounted for the width of the base of the lift hardware but I neglected the width of the hardware on the other end. In other words, the lift mechanism must completely collapse into the lid collar so that the table top lies flat against the lid collar. This picture sums it up. The top of the lift hardware will stick out about 1.5 inches. Now what?

One mistake leads to another. I’m sure someone famous said that. To correct the measurement error, I decided to fabricate another collar that I could stack on top of the collar I just made. Sounds simple enough. I had the materials to do do it too. No additional cost, just my time. By repeating the steps mentioned above I made another beautiful collar. By this time it’s October 24th and I’m getting closer to the crunch time of the holidays. I really needed to get this project wrapped up. I had several more build projects to finish before Dec 15th. This reminds me of work.

Suddenly I realize the depth of my big mistake. It wasn’t going to be an easy fix. I was not able to replicate the exact same collar dimensions. Somewhere in my process of measuring and cutting small discrepancies crept in. Hard to see at this point but very obvious when the two collars are stacked on each other. Take a look at these pictures and notice there are overlaps and overhangs that look terrible. I’m running out of time but I also don’t want to spend more money to fabricate a new lid collar.


I aligned the the two lid collar pieces the best I could. I used wood puddy to seal gaps and cracks and I sanded the material down so that all overhangs and overlaps were smooth. I glued the two pieces together using dowel joints to provide cross sectional rigidity. This photo was taken on Oct 26th 2024.
Stain and Finnish
I was able to multi-task while dealing with the lid collar. While all the glue was drying I did my final sanding and surface prep to apply the stain to the body of the chest. I think the chest is made of cedar. I used a light stain called Golden Pecan which really made the red tones pop. I intentionally left areas of the body discolored and rough so that the original ruggedness showed through.


I did need to fabricate a corner protector. I used a piece of corrugated tin left over from my raised garden project and cut a matching section. I flattened it using plyers, it’s a bit rough but will work. I bought new edge protectors for the lid collar on Amazon but I wasn’t able to find corner protectors for the base. Instead I had to use plyers to bend the damaged corner protectors back into shape. Remember I bent those to hell prying them off the chest back in step 1.
I also took this time to spray paint the hardware using hammered copper spray paint. The handles where pretty badly corroded. I thought they were copper. I tried to remove the corrosion by soaking the handles in vinegar and worked but it also removed the zinc coating. They weren’t copper at all. Now they just looked ugly. I didn’t want to spend more money on hardware so I decided to reuse the hardware I had.

By October 28th I had the new lid collar ready to be stained. I found my next mistake while performing a dry run on the collar using the original hinges. Remember I said mistakes breed more mistakes? Well the mistake I made in measuring the lid collar which required me to route out that 1/4 inch so it would fit on the chest lip resulted in a situation where there wasn’t enough thickness in the collar wall to attach the hinges. Ugh. My solution was to add back wood to the collar so that I could screw in the hinges. I cut 1/4 inch thick sections of wood and glued them to the lip, effectively removing the need for the route in the first place. I could have gotten away with only routing out the 1/4 inch of wood on 3 sides.


I ended up having to reinforce the added 1/4 of wood for the hinges using small screws because the wood glue just wasn’t strong enough to stand up to forces of drilling a pilot hole and screwing the hinges into place.

At this point I’m really feeling the pressure. It’s now November and I’m planning our Thanksgiving and I haven’t even started my other build projects. I knew I could get it done but it was going to require my full attention. I will have to spend all of my time over the next couple of weeks to get this done in time. I finished staining the chest and added a couple of coats of poly to make the base nice and shiny. I added all my freshly painted hardware. I reused my brass screws where I could. I ended up buying more brass screws to secure the edge protectors. But those didn’t go onto the box until much later.


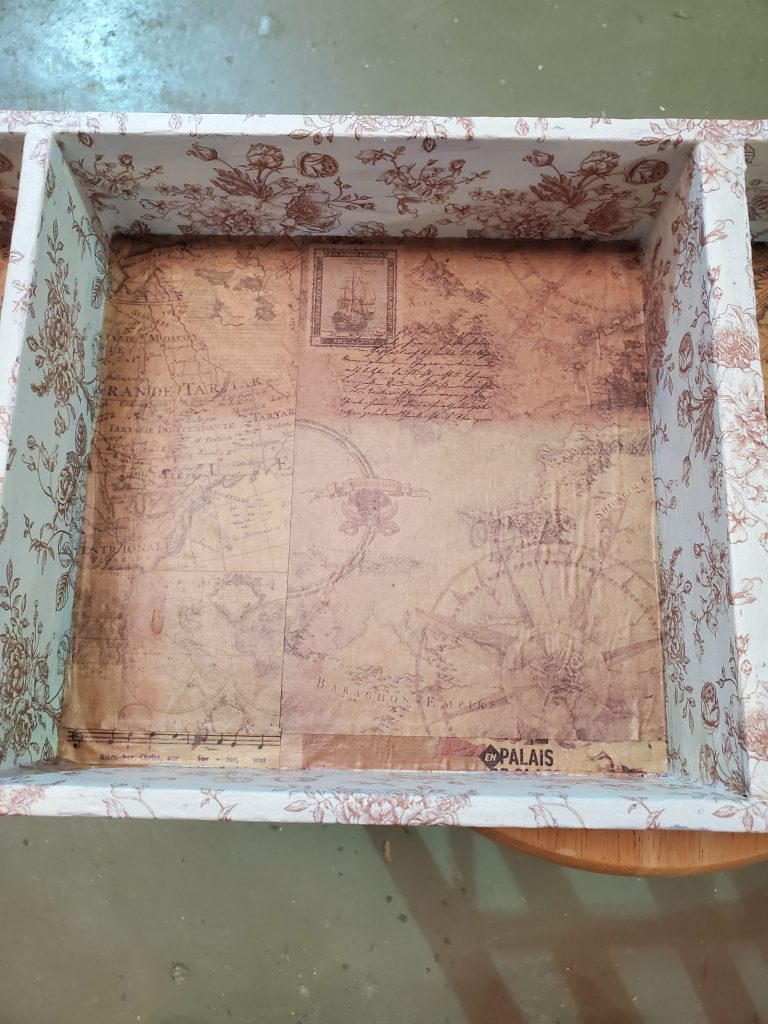
I decided to finish the interior of the box and decoupage the sliding shelf with Victorian themed paper. I also discovered that the pine wood stains very differently than cedar. It looked terrible so I decided to also decoupage the lid collar using a floral print that matched the look of the interior of the box. It took several days to complete the decoupage and finish with Mod Podge.


The Table Top
By November 19th I had acquired the oak veneer plywood that I was going to use for the table top surface. I wanted a relatively supportive table top but also wanted a limit the amount of weight. The hydraulic lift can only lift so much weight. I decided to use 3/4 inch plywood for the strength but I didn’t want to paint the surface. An oak veneer would make the top look professional. I spent about $100 on the sheet of red oak veneer plywood and red oak veneer tape. I rationalized the red oak would closely match the cedar color and the veneer tape would allow me to cover the plywood layers with a surface that matches the table top.

I knew that cutting the veneer was going to be a challenge. Veneers have a tendency to flake when cutting. I did a little research and learned that fine cutting blades with 60 or more teeth help minimize flaking. There were other techniques as well and after making my cut I learned that a fine cutting blade isn’t enough. Next time I’ll use a sandwich technique to protect the veneer edge. My cut caused a lot of flaking. I covered it with wood puddy, sanded it and stained it. Good thing it goes on the bottom of the table top.
I used a stain called Gunstock which had a red tone that I thought closely matched the red tone of the stained cedar. I sanded and stained the oak veneer plywood. This part was pretty easy, it just took time to lay the stain and for it to dry. Since I had to walk away while the stain was drying I was able to start my other build projects. After the stain was dry I applied the oak veneer tape to the ply wood edges. This is a great way to hid the ugly plywood layers visible on the side. The veneer is applied to the raw edge using a hot iron. After it’s been ironed on I used a razor blade to trim off the excess. It was harder than it sounds to trim that tape.


Those pictures where taken on Nov 21st. About a week away from Thanksgiving. I’m stressed but making time. I did end up applying coats of poly. I learned an important rule about applying poly. Clean your work surface. After the first coat dried I noticed debris in the finish. After reading online about how to solve for that I briefly sanded the surface to take out the dust and bubbles with the belief that the 2nd coat of poly would dry smooth. While the surface did feel smooth after the 2nd coat it wasn’t until later on that I discovered scratch marks under the surface. So did that happen when sanding the oak veneer plywood surface before the stain or did that happen while sanding out the dust and bubbles after the first coat of poly? I will never know for sure but I did learn the value of using the appropriate grit sandpaper for such an important surface.
Wrap up
Did I mention that in addition to hosting Thanksgiving we also took a little vacation to the beach. That was timely and wonderful. I finally wrapped up the project on December 7th. Incidentally I was able to finish all my other build projects except one. C’est la vie. Take a peek at the finished product.


This was a fun and challenging project. I learned so many different things. Sometimes it was an emotional roller coaster and at times I had to just walk away. I’d do all over again. My daughter loves the final product and I was able to breath life into an old box destined to be burned.
Mistakes
I’ve listed the critical mistakes that I learned along the way completing this project.
- Not being careful to damage or destroy original parts. You can’t always replace with something modern at a reasonable price. You’ll likely need to reuse hardware to keep the cost down.
- OMG measure, measure, measure, counter measure and double check the design.
- It’s important to match wood types otherwise staining will produce multiple degrees of a finish.
- Learn how to properly use a router and use fixed guides when cutting edges.
- Understand there is a margin of error when measuring and cutting along that measurement. Double, triple check and know your tools.
- Cutting veneer plywood requires a sandwich cut in which the veneer at the bottom is protected by the edge of an underlying board so it can’t flake.
- Use the right grit of sandpaper for the surface. A highly visible surface needs to be properly sanded.